
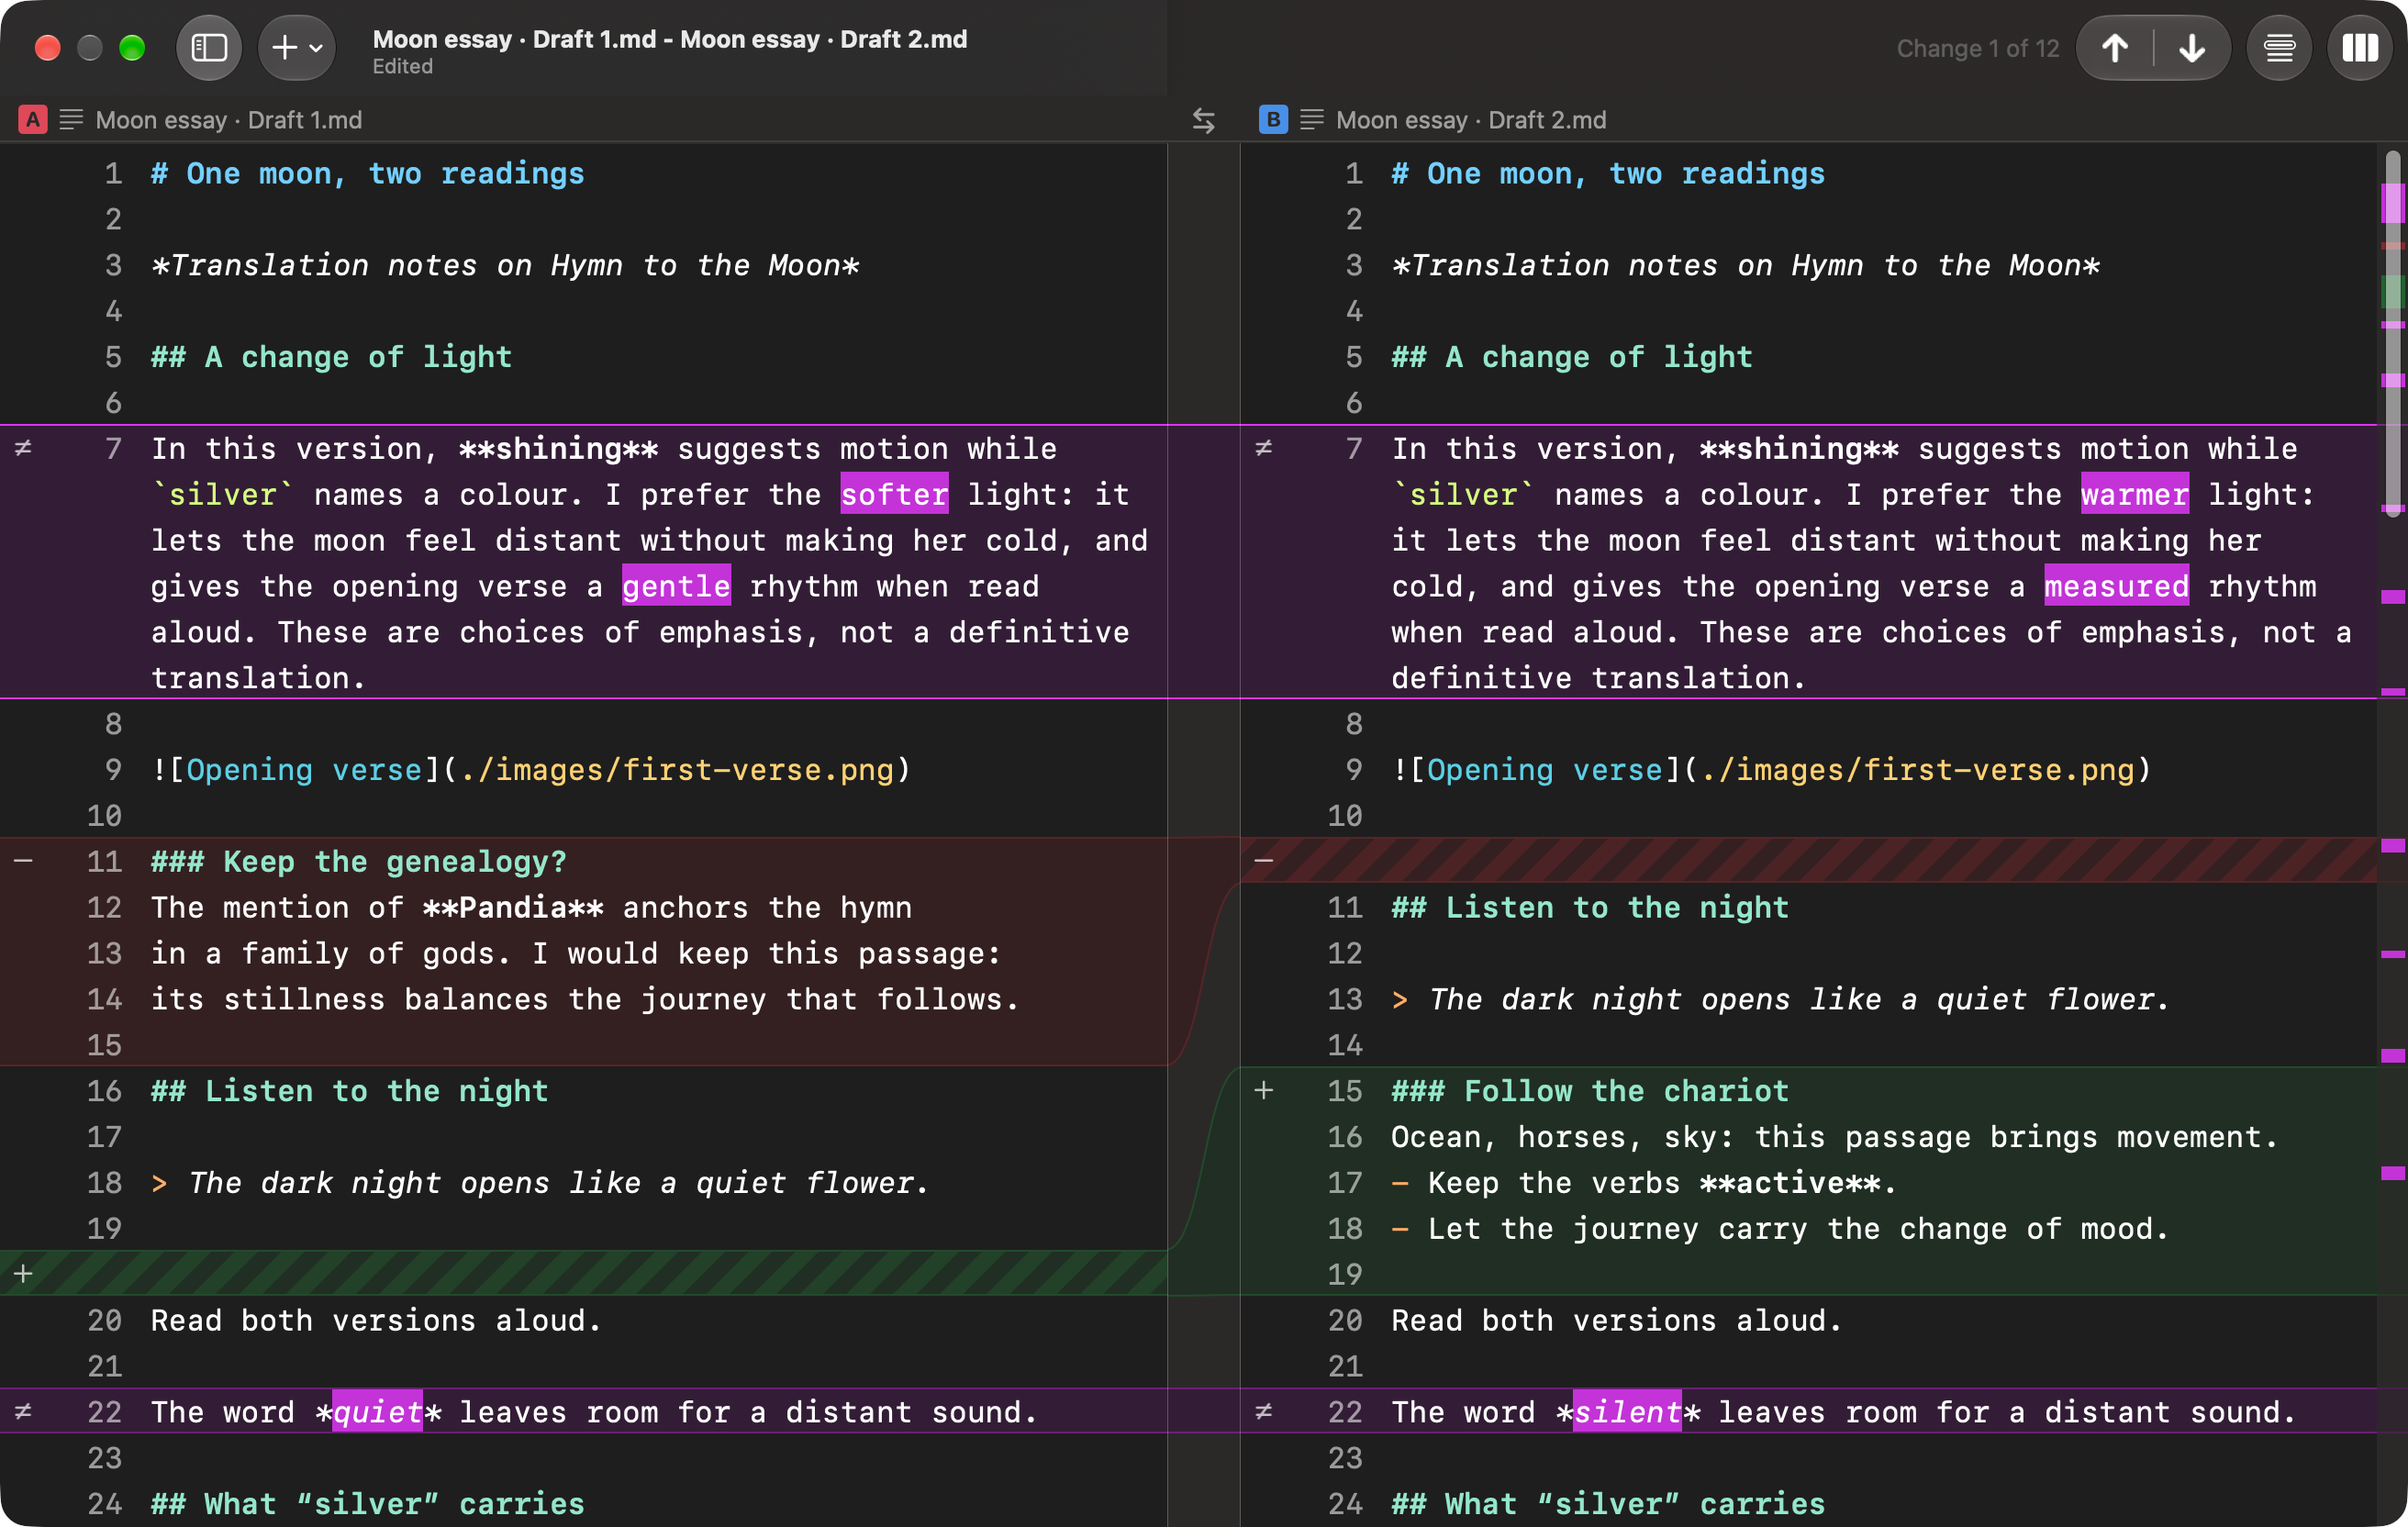
Your first comparison
JuxtaText compares two versions of text side by side. Use it to review a revised draft, find a small wording change, or see what was added and removed between versions.
-
Open JuxtaText and press ⌘N (Command–N) to start a comparison, then drag the earlier version over side A on the left. You can also start a comparison by dragging a file onto the JuxtaText icon in the Dock.
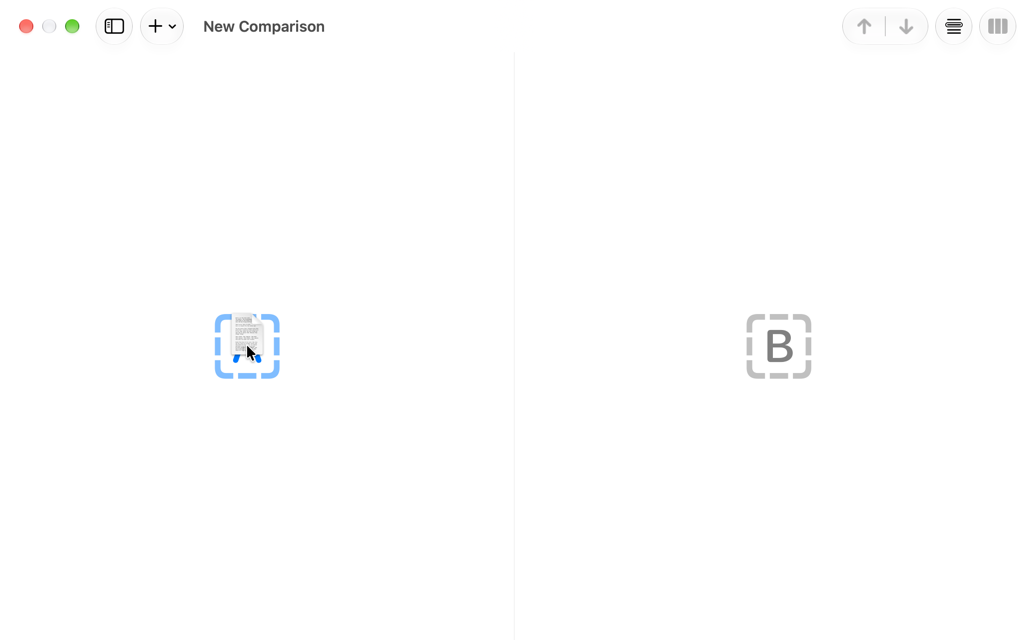
Start with the earlier version on side A. -
Drop the first file, then drag the revised version over side B on the right. You can also open files or paste text into either side.
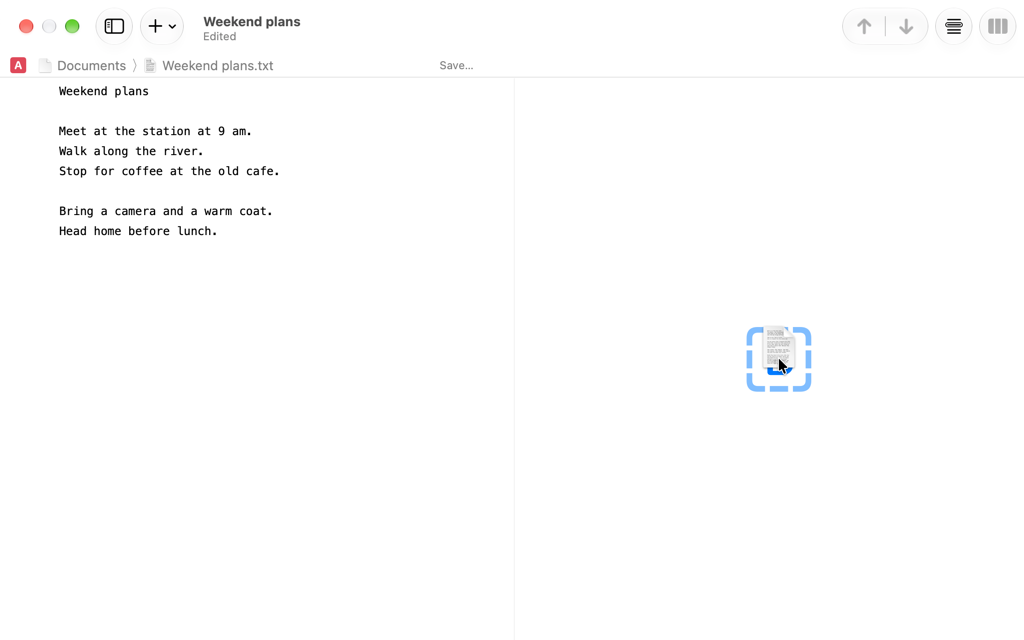
Add the revised version to side B. -
Review the highlighted differences. JuxtaText shows changes to whole lines as well as individual words.
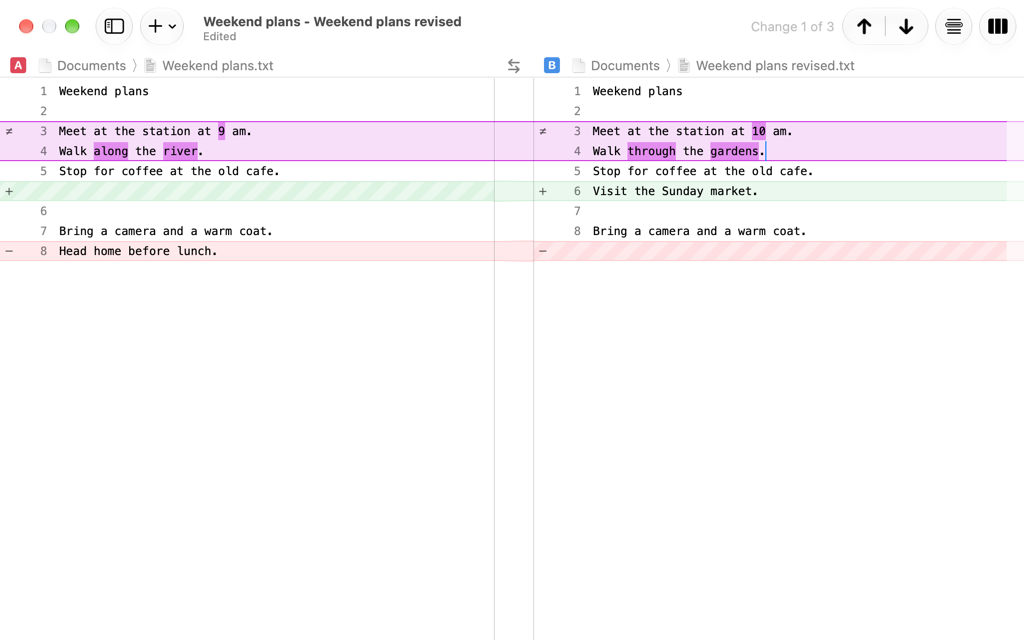
Read the two versions side by side. -
To keep another version handy, open the sidebar and drag a third file into it. Your current comparison stays in place.
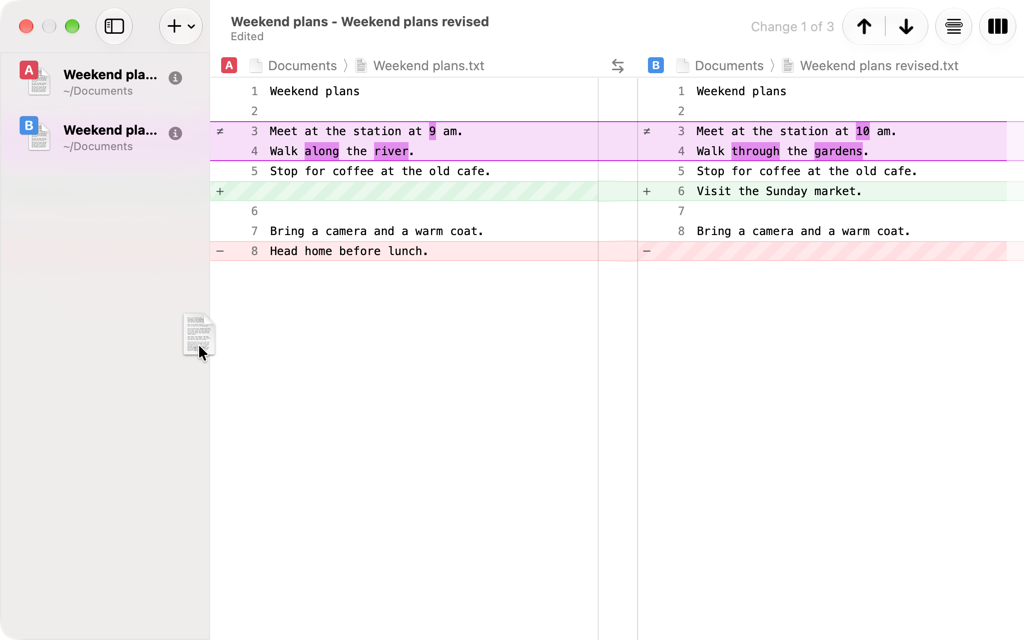
Keep another file in the sidebar.


You can keep several comparisons open in separate windows. Give each pair of drafts its own window so you can move between them without replacing the text you are reviewing.
Two-way comparisons and in-place editing are free. If you want to save edited text back to a file or copy it out of JuxtaText, you will need JuxtaText+.
Read the differences
Read a comparison from left to right: the left side is your starting point, and the right side is the version you are comparing it with.
Removed text appears on the left where a passage is absent from the right. Added text appears on the right where a passage is absent from the left.

Changed words are highlighted within a line, so you can spot an edit without rereading the whole passage.

The striped area gives you somewhere to click and type when that side has no corresponding line. Until you enter text there, it has no line number and does not represent a line in that source file.
An actual blank line is different: it is unstriped and has a line number, even though it contains no text. In this example, line 6 is a real empty line; the striped area above it is an editable space for a line on that side.

Click into the striped area and press Return to insert a newline on that side. The new empty line becomes part of the text and receives a line number. Here is the same area after inserting the newline:

Press Backspace to remove the empty line and restore the striped area.
For longer documents, use the previous and next arrows to move between differences. The change count shows your current position and the total number of changes; markers along the scroll track show where changes occur throughout the comparison.

Edit and save
Click into either side and edit the text directly. Correct a typo, replace a word, rewrite a paragraph, or paste in a new passage. Line and word differences update as you type.
You can also use a section’s context menu to work with the whole section at once. Move the pointer over a changed section, then left-click the small bar that appears beside it in that side’s gutter. You can also Control-click or right-click the section’s text. These actions apply to that section and its corresponding section on the other side, rather than just the word you clicked or the text you selected.

- Replace with A / Replace with B replaces the section you opened the menu for with the corresponding text from the other side. For example, to keep the earlier wording from side A, click the gutter bar beside the revised section on side B and choose Replace with A. Side A stays unchanged.
- Insert A at Start / Insert B at Start copies the other side’s section before the current section, keeping both versions. Use it when the other version contains an introduction or passage you want to retain ahead of your current text.
- Insert A at End / Insert B at End copies the other side’s section after the current section. Use it to bring both versions together, then edit the combined text into the wording you want. Both insertion actions leave the other side unchanged.
- Swap exchanges the corresponding sections between A and B. Use it when you want the wording on each side to take the other’s place; this action changes both sides.
- Revert restores the section on the side you clicked to its original contents before you edited it in the current comparison. Use it to discard your changes to that section without reverting the rest of your work.
Unavailable actions are dimmed. In the screenshot, Revert is dimmed because that section has not been edited yet.
There are two different ways that your changes can be saved:
-
The comparison document. Snapshots of files and text clippings that you paste into a comparison are kept in this document. Your edits are also typically saved to the comparison document. Editing and saving like this is available in the free version of JuxtaText and mostly happens automatically.
-
The edited text. Saving changes back to the original files, exporting plain text, or copying edited plain text requires JuxtaText+.


Editing a comparison is not the same as writing those changes back to its source files. If another app needs your revised text, use the saving, plain-text export, or copy features in JuxtaText+.
Before you start editing, decide how you will use the result. Free mode lets you explore editing to see how it works and keeps your edits in a comparison document; producing edited plain text for use elsewhere is a paid feature.
To save your edits back to an original file with JuxtaText+, click Save… in the header above the edited side. You can also click the file’s info button in the sidebar and choose Save… in its Actions section. Review the changes in the save preview, then confirm that you want to overwrite the original file. If macOS asks for access, select that original file in the save dialog.

Export a comparison
With a comparison open, choose File → Export PDF or Image… to open the Export Comparison sheet. Visual exports are free: choose PDF to share a document or PNG to use the comparison as an image. The preview changes as you adjust the settings.
Choose the format and lines
The PDF / PNG control at the top switches between document and image export. Under Lines, keep All lines selected to include the whole comparison. Clear it to enter a Start Line and End Line when you only want to share part of the text.

Set the PDF page layout
For a PDF, Pagination → Pages divides the comparison into paper-sized pages. Choose A4 or US Letter, then Portrait or Landscape. Continuous instead makes one long page; set its width in either inches or centimetres.


Set the PNG image size and font
For a PNG, Size → Width sets the image width in pixels. Leave Height blank to use the natural height, or enter a fixed height to divide a longer comparison into multiple images. Choose 1× or 2× under Resolution; 2× renders at twice the pixel dimensions for a sharper image at the same display size.
Under Font, choose a family, variant, and size in points. These controls also apply to PDF exports.

Choose the appearance
Under Appearance, choose Light or Dark for the exported comparison, independently of your Mac’s appearance. The highlighting menu offers None, Monochrome, and Default for Markdown highlighting. PNG exports also have a Border setting: None, Thin, Medium, or Thick.
The remaining appearance switches control what appears in the result:
- Word differences highlights changed words within changed lines.
- Headers display the source names above the two columns.
- Line numbers display the original line numbers beside the text.
- Page numbers numbers paged output, such as a PDF with Pages selected or fixed-height PNGs.
- JuxtaText footer includes or removes the product footer.

Check the preview and export
Use the live preview to check the selected lines, page or image breaks, and styling. The bar below it summarizes the output. Click Export PDF… or Export Image… to save it. When the PNG settings produce several images, JuxtaText asks for a destination folder and filename prefix. The copy button beside the summary can put the PNG image or images on the clipboard instead.


A visual export records the comparison as it looks. Exporting editable plain text is a separate JuxtaText+ feature.
Follow words with TwinFocus
Included with JuxtaText+. TwinFocus helps you follow the relationship between words on both sides of a comparison, especially when a long paragraph contains many small edits.
With TwinFocus enabled, hover the pointer over a word. JuxtaText also highlights its matching word on the other side, making it easier to see where the same wording appears in the revised passage.
TwinFocus updates while you edit, so you can see how word matching changes as you revise a sentence. A time-limited preview of TwinFocus is available in Free mode.
Compare Markdown
Included with JuxtaText+. Markdown highlighting makes the structure of a Markdown document easier to read while you compare its text. Headings, emphasis, lists, and other Markdown syntax within the comparison.
Open your Markdown files or paste Markdown into a comparison. JuxtaText can detect Markdown in pasted text as well as work with files. Free mode includes a time-limited preview of Markdown highlighting.
JuxtaText 2 focuses on general text and Markdown. For source-code comparisons with highlighting for a wide range of programming languages, see JuxtaCode.
Merge two versions
Included with JuxtaText+. Start with a comparison of the two versions you want to combine. Click the three-pane Open new merge icon in the comparison toolbar to open them in the Merge Tool.

Know which pane is the result
The left and right panes show the two source versions. They are read-only. The middle pane is the result, and it is the only text view you can edit. It starts with the right version’s text. Choosing material from either side changes the middle result while leaving both sources intact.
The three panes stay aligned as you work, so you can compare a passage with the result beside it. Review and refine the middle pane before saving or exporting: that is the text JuxtaText uses as the merge output.

Choose from the toolbar
Use the previous and next controls beside the change count to select a changed section. Then click Choose Left or Choose Right in the center of the toolbar to put that source’s version into the middle result. The small menu arrows beside those controls offer Choose Both, with either side first, and Choose All From Left or Choose All From Right to resolve every remaining section from one source.

Choose from the middle pane
Move the pointer over a changed section in the middle pane and click the small bar that appears in its gutter. Its menu offers Choose Left, Choose Right, Choose Both (Left First), and Choose Both (Right First) for that section. You can also right-click the middle pane’s text to find these actions above the usual editing commands. Revert restores a section you have edited to its original contents; it is dimmed until that section has been edited.

You can type directly in the middle pane when neither source has exactly the wording you want. Differences and word highlights update as you build the result. When you are satisfied, save the merge document or export the result.
Free and JuxtaText+
JuxtaText Free includes two-way comparisons, editing either side in place, multiple comparison windows, and visual exports as PDF or PNG. Edits persist within your .juxta document.
JuxtaText+ adds saving edits back to source files, exporting or copying edited plain text, TwinFocus, Markdown highlighting, and the three-pane Merge Tool.
JuxtaText+ is an optional subscription. The App Store shows the price in your region before purchase. Eligible new subscribers can try the fully unlocked app with a three-day trial on the monthly plan or a one-week trial on the yearly plan.
See JuxtaText+ pricing and questions for more detail, including the one-time-purchase option through JuxtaCode and information for people who previously donated.
Get help
If something is not working as expected, get in touch. Include your JuxtaText version, your macOS version, what you were trying to do, and what happened. A small example of the two texts can help explain a comparison issue; remove any private information before sharing it.
For a history of fixes and improvements, read the changelog.